
 by
by 
In this manual, we will describe how to transfer Facebook pixel to a thank-you page on a landing page that is uploaded to Keitaro.
Title
Important note
In order not to send the referrer of the offer page with the pixel, add the following code to the <head> tag of thank-you page:
<meta name="referrer" content="no-referrer">
The code should look like this:

Receiving pixel ID in Keitaro
First of all, you need to decide how you are going to receive a pixel ID. To receive a pixel ID on a thank-you page we need to receive it correctly in Keitaro and transfer it through a landing page.
The pixel id is passed to the tracker via the incoming URL as a GET parameter no matter what integration script is used if any at all, e.g.:
http://domaintracker.com?pixel=12345
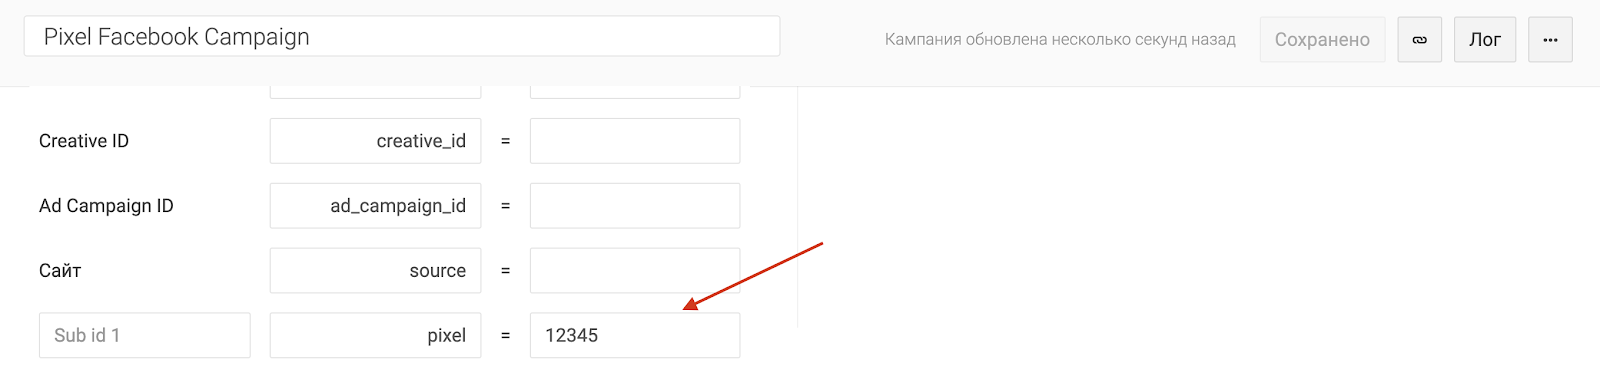
Where http://domaintracker.com is your campaign’s link, and the pixel is any of the parameters in which the id of the pixel will be transferred. You can use any parameter name instead of the pixel but you should add this name to the Parameters tab in your campaign’s settings so that the tracker can get and save the value of the parameter:

The name of the parameter should be added to the second column the way it will be used in the URL. When the tracker will find the coincidence and will add the value to the click in the campaign.
Sending the pixel to a landing page
There are two possible ways of setting up:
- The landing page is added as a redirect link to the tracker;
- The landing page archive is uploaded to Keitaro.
The redirect landing page type
In case you send the traffic to a landing page or to a remote index file on a server via a redirect or a preload feature, you need to transfer the pixel further the way you got it as a URL parameter.
The pixel is already recorded in our pixel token, so to pass it further we turn our parameter into a macro, wrapping it in braces – {pixel}.

An uploaded landing page
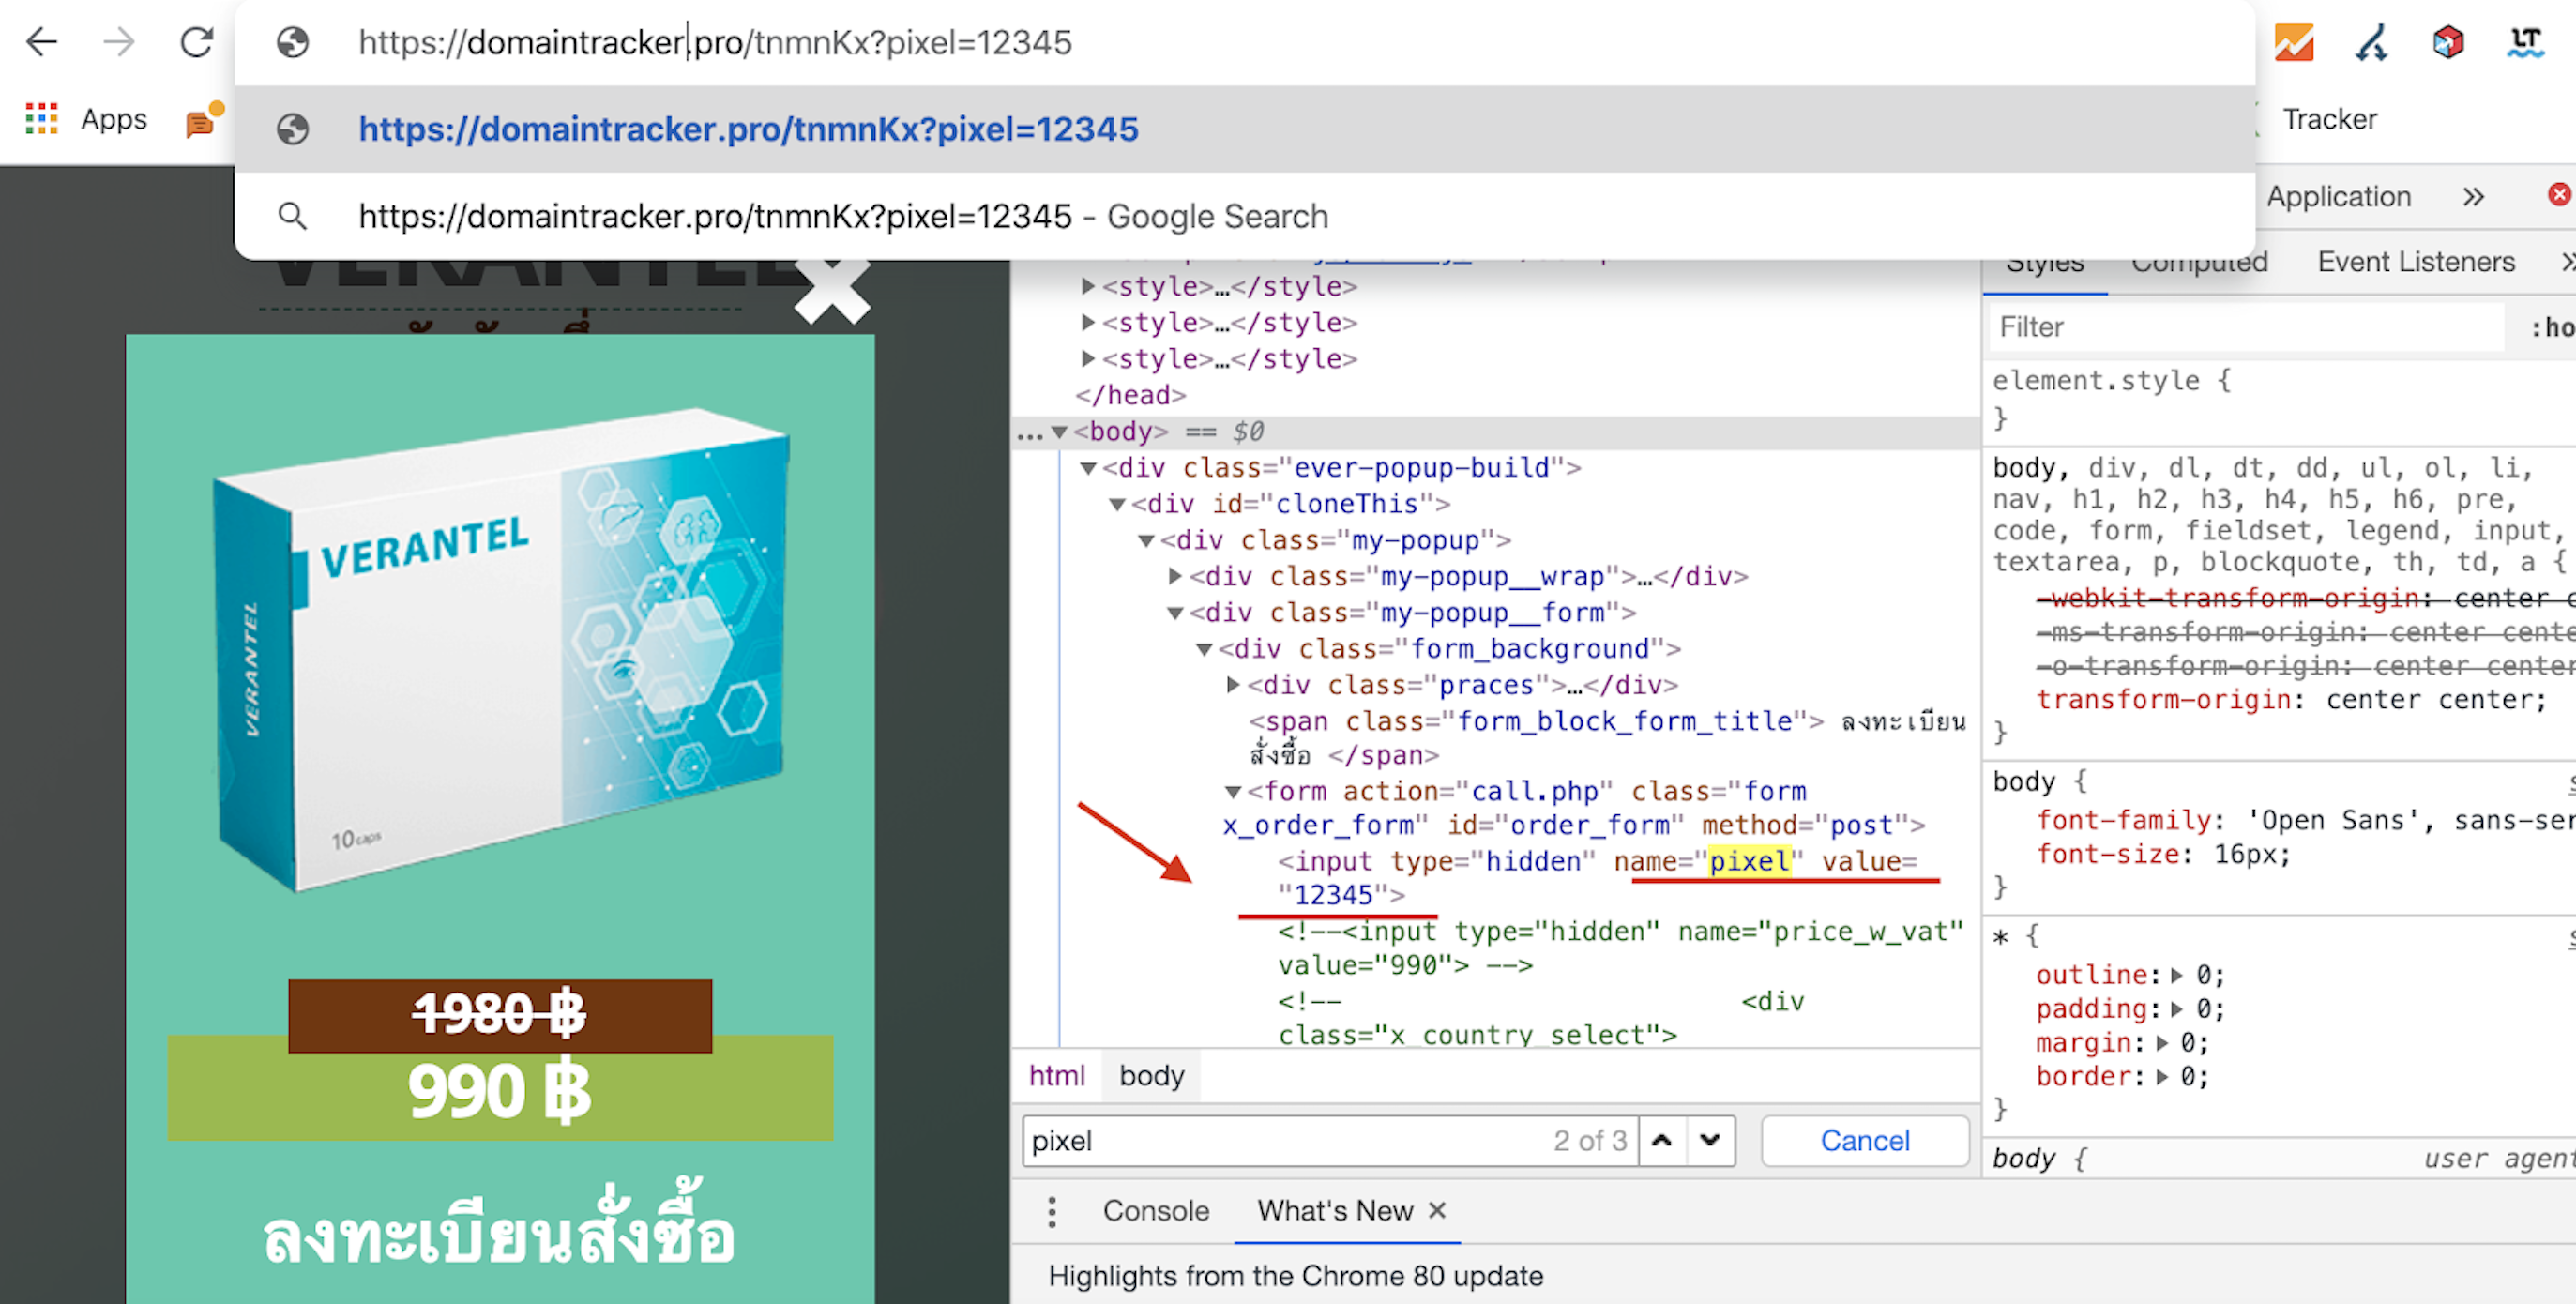
If the landing page is uploaded to the tracker, then the tracker automatically transfers all recorded incoming parameters to the landing page or an offer by POST method and you can get them simply using a macro. In our case, it is enough to use the following construction:
<input type="hidden" name="pixel" value="{pixel}">
After opening the landing page, the real pixel value will be substituted instead of the macro and we get:
<input type="hidden" name="pixel" value="12345">
We follow the campaign’s address with the parameter:

And we get on a landing page:
Sending to a thank-you page
Local landing page > thank-you page
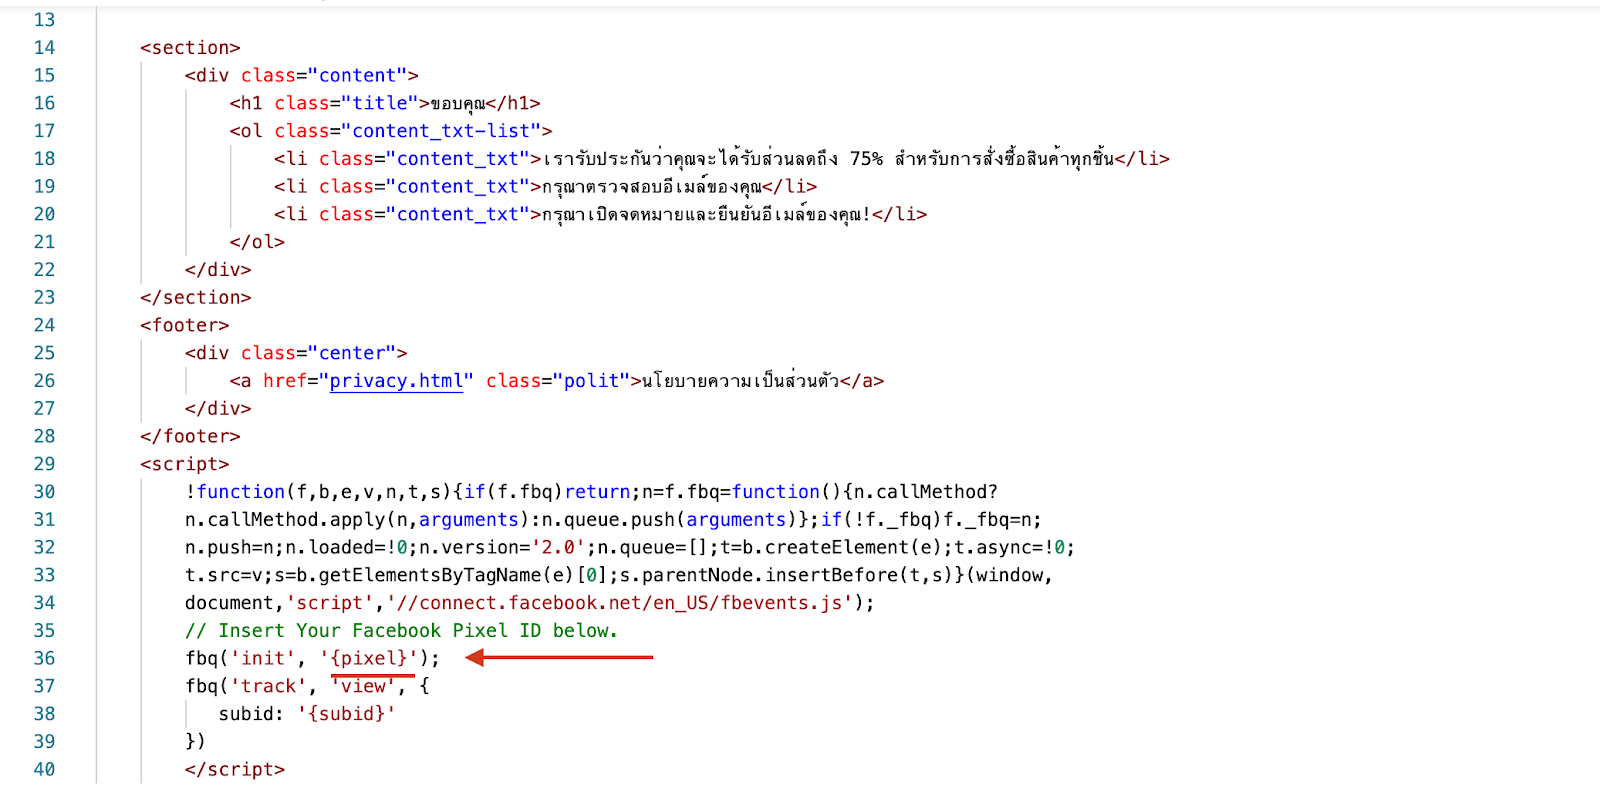
If you have a local landing page and the thank-you page is pulled through a handler, e.g., call.php, order.php, send.php, or others, then most likely your landing page has already configured the transfer of all parameters to the thank-you page and their automatic sending to the affiliate network. You just need to place the basic pixel code on the thank-you page and use the {pixel} macro to get the value to it.
If your thank-you page is integrated via the redirect the pixel should be transferred as a parameter in a link, and extract the value from a URL on a thank-you page and add it to a pixel.
Sending to a thank-you page:

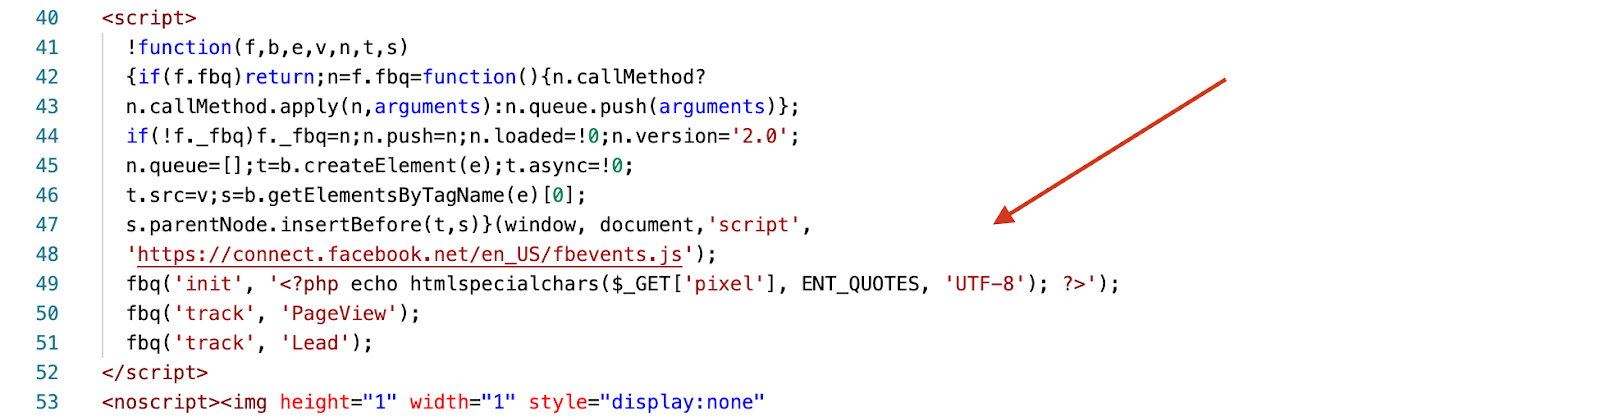
Receiving on a PHP thank-you page from a URL using the code:
fbq('init', '<?php echo htmlspecialchars($_GET['fbpixel'], ENT_QUOTES, 'UTF-8'); ?>');
Local landing page > local offer > thank-you page
If the offer is local the tracker’s script will process everything by itself and you will only have to use the {pixel} macro on a thank-you page.
If you are redirecting to an internal page or outside the tracker between the landing page and the offer, then you need to transfer the pixel as a parameter, next take it from the URL and transfer it further.
Use the following code:

Basics of transferring the pixel through Keitaro
- If you are working completely inside the tracker with the uploaded landing pages and offers the tracker will transfer all the parameters itself and you will only need to add macros to send the values to the page code.
- Add the {} brackets to the tokens in the second column of the Parameters tab and you’ll be able to receive the values in the code.
- If you are working with redirects or page redirects are set up with a href=, then you need to add your pixel to the code and send it to the URL yourself. Next, you will need to take it from the URL on the following page.
FAQ
The submission form is processed through a handler and an intermediate page, and there’s no pixel
Solution: send the pixel to the form and transfer it together with the rest of the parameters (name, phone number). Check the code on the intermediate page, there should be the code for intercepting the parameters and sending them further to the API and thank-you page.
Is it possible to transfer a pixel in a parameter from a website with Click API v3 and get it from cookies on the tracker’s domain?
No, it isn’t. Since the domain of the offer and the thank-you page will be from the tracker, and the website with Click API will be on its own domain, the cookie will not be transferred between domains.
Can I use the Facebook pixel shortened form?
Yes, you can, the pixel will work.
How can we pass the ID of a pixel directly to the campaign if we don’t want to pass it from the source in the URL?
Add the static value in the third column of the Parameters tab in the campaign’s settings.
Can I get the pixel from cookies?
Technically it is possible, but it makes no sense from a practical point of view. You will add the unnecessary code, where you first need to save cookies to the domain and then get them. It also makes no sense, because when working locally within the tracker, all parameters are automatically transferred with the POST method, and when working on different domains, you will not be able to share a cookie.
In case of any questions left feel free to reach out, we will be happy to help out.


 Keitaro Blog")
